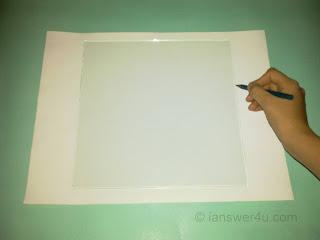
Steps and techniques of glass painting
Earlier we saw what glass painting is. Now lets learn how to make beautiful glass paintings. The most crucial part of a glass painting is its outline, as it will define the design or pattern. For this, you need to have a good and simple glass painting pattern. See more tips for making a good glass painting.1. Select a design
If this is your first attempt at painting on glass, then go for a simple glass painting pattern. Do not choose geometric shapes or designs as they may involve being highly accurate. Moreover, such designs require a stable hand for outlining. So to avoid being smudgy, select a design which requires less accuracy. Avoid straight lines, circles etc.
2. Select the glass size
Start drawing on small pieces of glass frames to start with. Choose square, round or rectangular piece of glass as per the requirement of the design that you have selected. Make sure that the piece does not have scratches or defects. You could choose a clear or tinted glass, according to what will suit your design best.
3. Cut a sheet paper
The sheet could be of a piece of a chart paper or normal paper. Measure the dimensions of the glass on which the painting has to be done and keep the sheet 1 or 2 inches more than the glass, for all the four sides or for the radius in case of a round shape. You can do without the margins as well but this just ensures more accuracy.
 |
| Glass Painting Instructions |
 |
| Glass Painting Boundary |
4. Make the design on paper
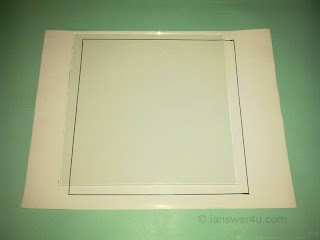
Keep the glass on paper and make an outline of the glass. Make the design inside the boundary. The design should be of the same size as you want it to be on the glass. Making a boundary is necessary to keep the glass in place when the design is traced from the sheet on the glass.
 |
| Glass Painting Pattern |
5. Clean the glass
Cleaning the glass is necessary to avoid any dirt, fibres or greasy material on the glass as they can make the outline smudgy on coming in contact with the outlining tube or paint. Fingerprints can also make the surface oily or just leave marks which can look really bad on a good glass painting. Thus to avoid all this, wipe the glass with any glass cleaning solution or simply with water to ensure that you paint on a good, clean surface.
 |
| Glass for Glass Painting |
6. Align the glass according to the design sheet
After the surface has been cleaned, put the glass over the design. Align the edges of the glass piece with the boundary (made in step 3) of the design. Avoid touching the surface of the glass.
7. Make the outline of the design on the glass
In most glass painting kits, 2 nozzles are given, one with wide opening and the other, with narrow opening. Attach the narrow one to the tube. Do not start outlining on the glass immediately. Try it on a piece of glass first so that the flow gets regulated. Otherwise the paint can come out in jerks and leave huge blobs of black on the glass. After the flow gets regulated, start outlining on glass. Press the tube gently and do not move the tube very fast to trace the design. Take your own time to get used to it. Don’t worry if there are a few blobs of black here and there. They can be scraped off easily once it dries. So you can just leave those portions and move ahead.
 |
| Glass Painting outline |
When you are done, leave the outline to dry for 3 hours. Ensure that it is not drying in a place where there is dust, as dust can settle on the paint resulting in less shine.
 |
| Glass Painting Outline |
8. Apply glass paints
After the black outline has dried completely, apply the water based colours on a rough piece of paper so that dried material (if any), can be removed from the nozzle tip and the paint can flow out smoothly from the bottle. Do not use a brush to apply the paint as it can leave patches. Apply the paint slowly. If there are any bubbles then break them immediately with the help of a needle tip or a sharp object. If the paint goes outside the outline then rub it off with a piece of cotton immediately.
Leave the painting to dry for 24 hours. Do not touch the painting in between.
 |
| Glass Painting |
9. Do the required touch up
Once the painting has dried see it against a source of light. This will tell you the portions where the paint is less or thin. If required, do another coating of paint on it.
I hope you must have learnt at-least a bit on How to make glass paintings. Next we will discuss tips for Good Glass Painting.
Also enjoy Popular n Successful Advertising slogans, mottos, taglines
Copyright © ianswer4u.com
Read More :
What is Origami, a paper folding art?
Steps to make a origami paper plane
Tips for making perfect origami product


it's good
ReplyDeleteGood advice.
ReplyDeletei liked it!!Gud advice
ReplyDeleteThe information and photos are well presented on this post. Everyone will like to read those steps and techniques.
ReplyDeleteI like the way you taught me glass painting. every little detail was told in asimple way. Thank you.
ReplyDeletenice
ReplyDeletewhich outliner did you use?
ReplyDelete