Instructions for making Origami Airplane:
After seeing what paper-folding art origami is, today we will learn how to make origami paper planes, so fasten your seat belts and follow the steps.
- Since you are making it for the first time, use a rough paper. To differentiate easily between the front and back sides of the paper, I am using one side color paper. You can do the same for your reference.
- Cut a sheet with dimensions 7cm breadth and 20cm length. If you have different dimensions, make sure that the ratio of length and breadth is roughly 3:1.
- Hold one corner of the paper and bring it to a point where the breadth side of the paper is exactly aligned with the length. Fold the paper to make a crease.
- Repeat this step for the other 3 corners.
- Now, we have a crossed crease at both ends.( Observe that this area of crossed crease covers a square)
- Turn the paper to the other side and align the paper vertically
- Fold the upper crossed crease area exactly into half such that the fold is outwards and make a crease. Notice that this crease will also pass through the meeting point of the crease made in step 3.
- Unfold the paper and turn to the other side.
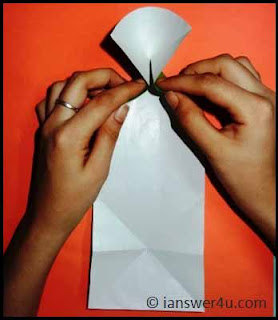
- Pick up both the ends of the crease made in step 7 and bring them together.
- Touch this fold to the rest of the paper and press it, so that it stays that way.
- We now have a triangle at the top.
- Fold the entire paper into half along its length. Make a slight crease in the whole length.
- Unfold the paper and align it vertically such that the triangle is at the top end.
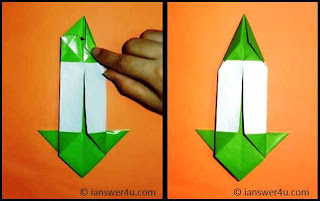
- Pick up right corner flap of paper (not both the layers) and align the side( above the corner) exactly with the crease made in step 12.
- Repeat step 14 for the left corner.
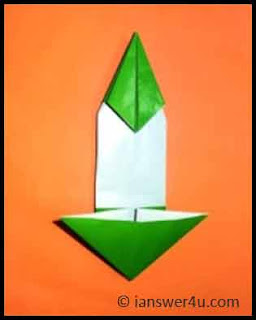
- Repeat steps 6,7,8,9 and 10 for the other end of the paper
- Turn the paper to the other side and align the paper vertically.
- Pick up the left edge of the hexagon and align it exactly with the crease in the centre(made in step 12)
- Make a crease only with the upper flaps. You can see that the flaps made on the other side are protruding.
- Pick up the right edge of the hexagon and align it exactly with the crease in the centre(made in step 12)
- Turn the paper upside down, such that the triangle comes at the bottom.
- Of the upper part, fold the right flap such that it is aligned with the crease in the centre.
- Repeat step 22 for the left.
- Turn the paper to the other side.
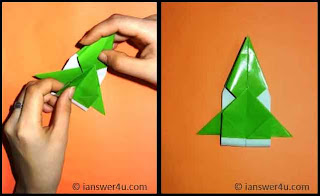
- Fold the other end of the paper upwards and let the triangular part slightly overlap the top portion.
- Insert the folded part into the top portion.
- The triangle which was at the lower end now makes the wings of the plane.
- Notice that the wings(the triangles protruding outside), are of 2 layers.
- Cut the 2 layers with a pair of scissors and fold the upper layer upwards.
- Now the body of the plane is ready. You can colour the lower end to give the effect of an exhaust or even open the folded part to show a parachute for the plane to land.
 |
| Color paper for Origami |
 |
| Completed Paper Airplane |
 |
| Airplane Landing |
I hope after following these instructions your paper airplane might be on its way in the sky. Next we will learn Some of the Origami Tips to make perfect paper product.
Copyright © ianswer4u.com
Read More :
What is Glass Painting?
Steps of Making a Glass Painting at home
Tips for making a perfect Glass Painting


0 Reactions:
Post a Comment